SISU 3D | FITTING INSTRUCTIONS
WHAT YOU WILL NEED
Bowl
Hot — but not boiling — water (170° F / 76° C)
Fork or similar utensil
Mirror
Instructions:
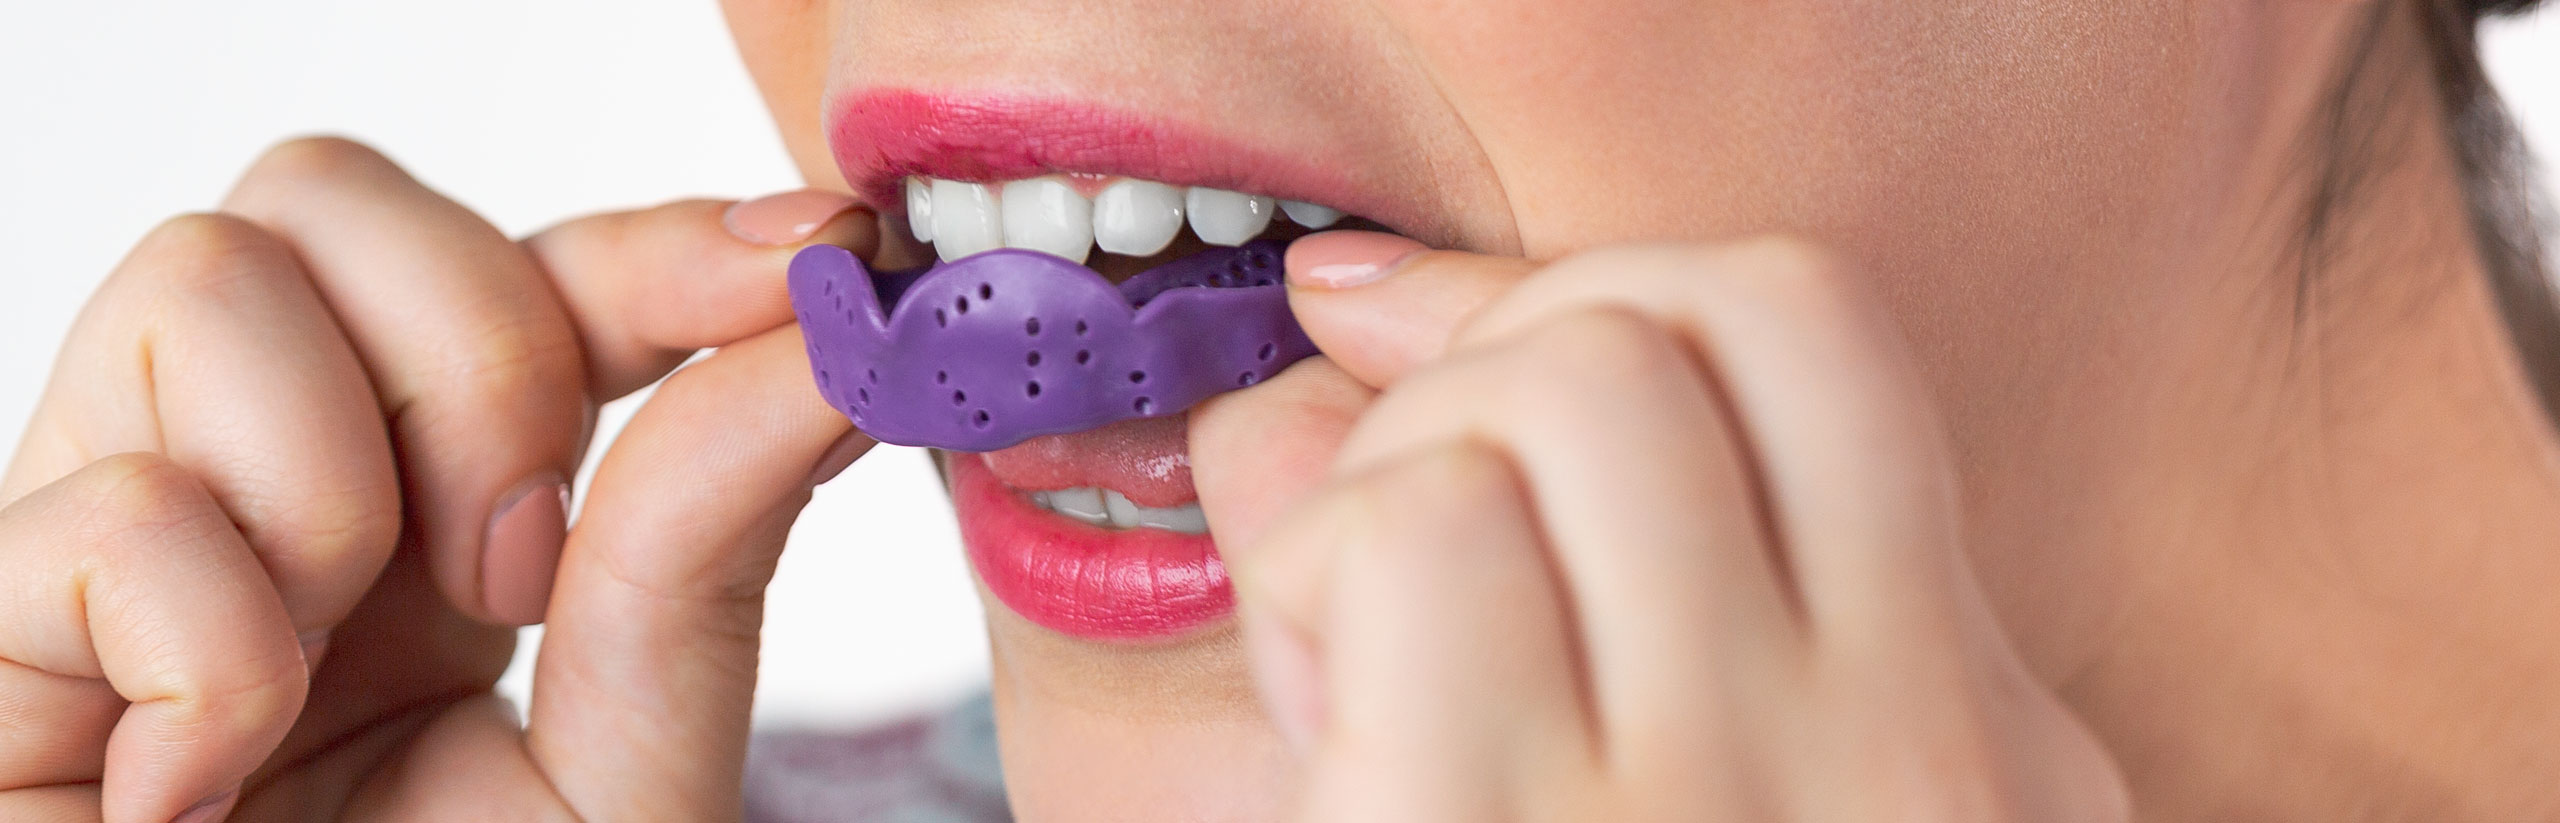
1.Wash your hands and the material with soap and water.

2.Heat water in a small bowl to approximately 170° F / 76° C (hot to the touch, but not boiling).
3.Place your SISU 3D Mouthguard into the hot water and wait until it becomes soft and pliable (use a fork or other utensil to determine mouthguard softness). It’s essential that you do not let the softened guard fold on itself. The material will glue together, making it difficult to reshape.
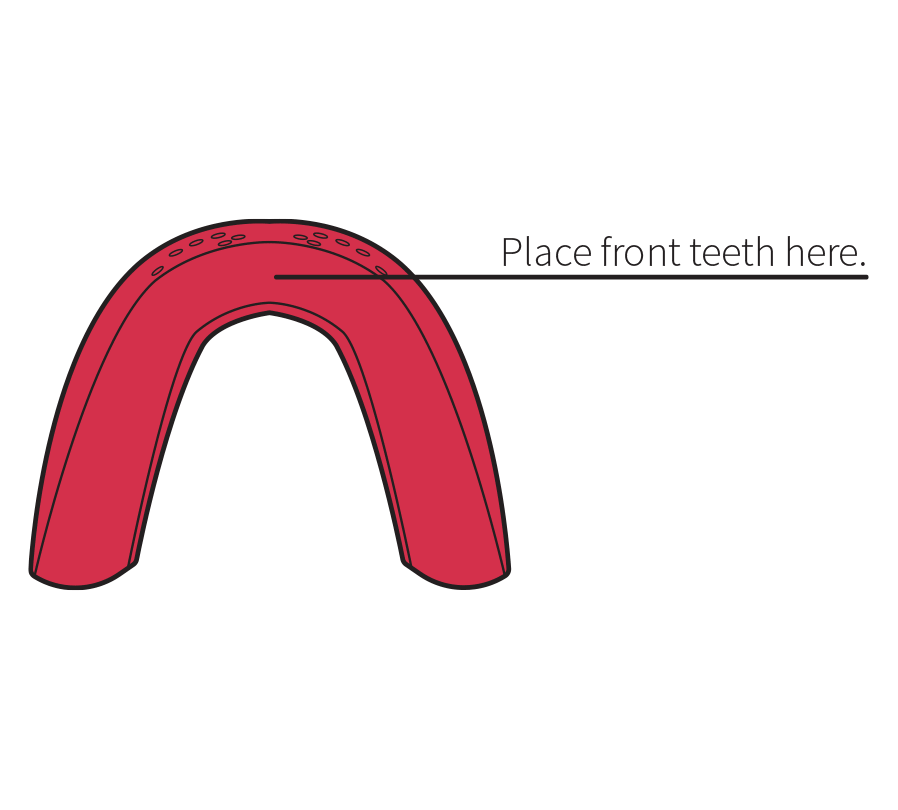
4.Holding the mouthguard with both hands, carefully insert the mouthguard. Make sure the back inner ridge does not fold in on itself. Bite down gently – do not make deep teeth marks.
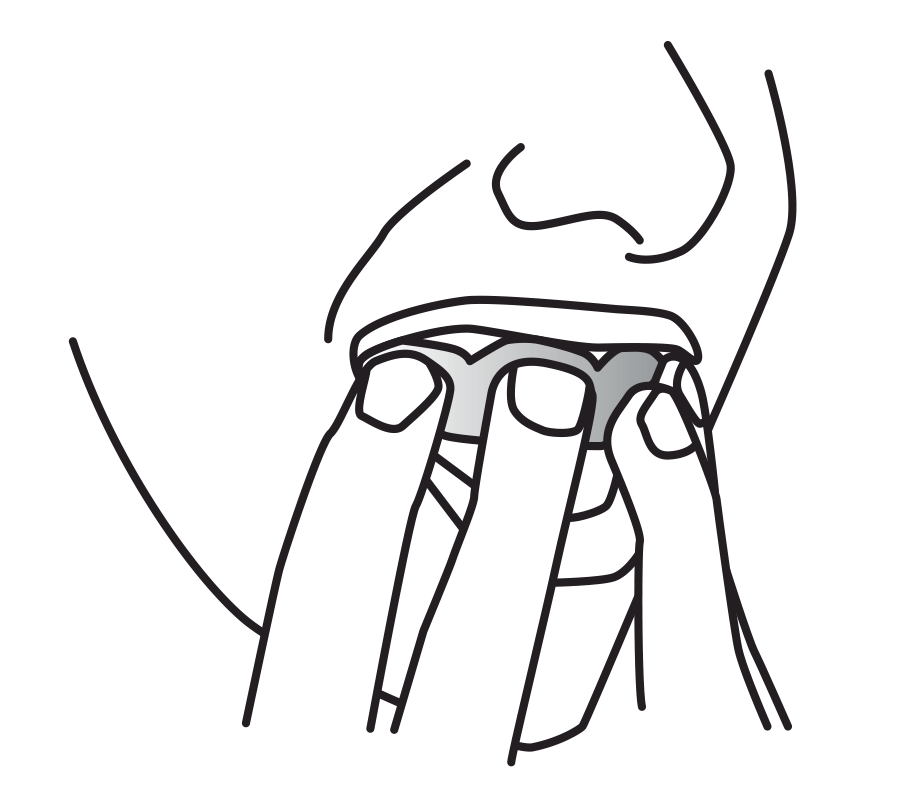
5.Once your SISU is in the proper position, close your lips over the guard and put your tongue to the roof of your mouth. Gently create suction by swallowing until the material has hardened to a snug, perfect fit. Keep the mouthguard in your mouth for 3-5 minutes to allow the shape to set. After the guard is set, it should be snug enough that it won’t come off your teeth without using your fingers to “help” remove it.
Did you mess up? Unhappy with your fit? Had so much fun that you want to do it all over again? NO PROBLEM! Every SISU guard is remoldable up to 20 times. Simply place your formed SISU back in the hot water, let it soften and straighten out, and there you go! Time for Round 2.
Here’s a list of things to consider when fitting your SISU!
Do THIS:
- Use water that is hot to the touch to activate your mouthguard
- Mold your SISU around all of your teeth (including molars)
- Mold and stretch the material to cover entire tooth surface area
- Suck in air gently, creating a snug but still comfortable fit
Don't do this:
- Use boiling water to mold your SISU!
- Leave your back teeth exposed!
- Overly stretch the material, creating too-large perforations
- Suck-in air too enthusiastically, creating a fit that's too tight
Check your fit:
So you've fitted your SISU, and you're ready to hit the field...not quite. Once you've fitted your SISU Mouthguard it's important to check to make sure that it's fitted properly. A proper fitting guard is essential for the Diffusix Technology in the mouthguard to function. Here is a quick checklist.
Should you encounter a problem at any point during the fitting process, please contact our team at customerservice@sisuguard.com
Tips for fitting with children:
There is a learning curve when fitting your SISU Mouthguard for the first time. No worries, this can be made easier when you do a couple of things first:
- If your child has braces, use the adult Aero guard regardless of their age and follow the directions for fitting with braces.
- Watch the video tutorial with your child
- Allow ample time for fitting (we recommend two days before needed if possible).
- Identify the bite pad on the guard, and practice aligning it with the teeth before softening the guard for the first time.
- The guard is formed by using vacuum pressure (suction). Re-familiarize your child with the concept of suction; grab a straw and practice.
- If you become frustrated. Stop and take a break! Call us for help or refer to the numerous other fitting videos on YouTube.